• About
  • Nutrition Services
  • Upcoming Classes

Cosmo Hippie Chef

~ Local Seasonal Food, Nutrition, Love

Cosmo Hippie Chef

Tag Archives: mexican

Taco Soup- Cosmo Hippie Style

08 Wednesday Feb 2012

Posted by cosmohippiechef in beans, soup

≈ 2 Comments

Tags

beans, cheese, mexican, soup, tomatoes

Food:

Taco Soup- Cosmo Hippie Style

1 lb. grass-fed beef (I used Canyon Meadow Ranch available at Tony Caputo’s on 15th&15)

1 15oz can black beans, drained and rinsed (look for BPA free cans)

1 15oz can kidney beans, drained and rinsed (look for BPA free cans)

1 15oz can aduki beans, drained and rinsed (look for BPA free cans) * I usually cook my own beans but when in a pinch I let the store help me out. I used Eden canned goods.

1 8oz can tomato sauce (again, BPA free can)

1 jar home canned tomatoes w/their juice (if you don’t have this, use a large can of your favorite tomatoes)

1 4oz can diced green chilies

1 large onion, chopped

4 cloves garlic, chopped

2 T. mexican spice mixture (recipe to follow)

1 package dry Ranch Seasoning (I got this tip from my cute friend Trish)

2c. water

Mexican Spice Mixture:

6 tsp. cumin

3 tsp. chile powder

1 tsp. chipotle powder (I used cayenne pepper)

2 tsp. salt

1 tsp. pepper

1 tsp. oregano

2 tsp. garlic powder

-mix these all together and keep in an airtight jar to use for your recipes, I got this recipe from Vogue Vegetarian.

Directions:

1. Place a large saute pan over medium heat drizzle in 2 tsp. canola oil. When its hot add the onions and garlic, start to saute. Season with salt and pepper. After about 5 minutes add the grass-fed beef. I use a potato masher to break the meat up. Continue to saute until the meat is almost cooked through.

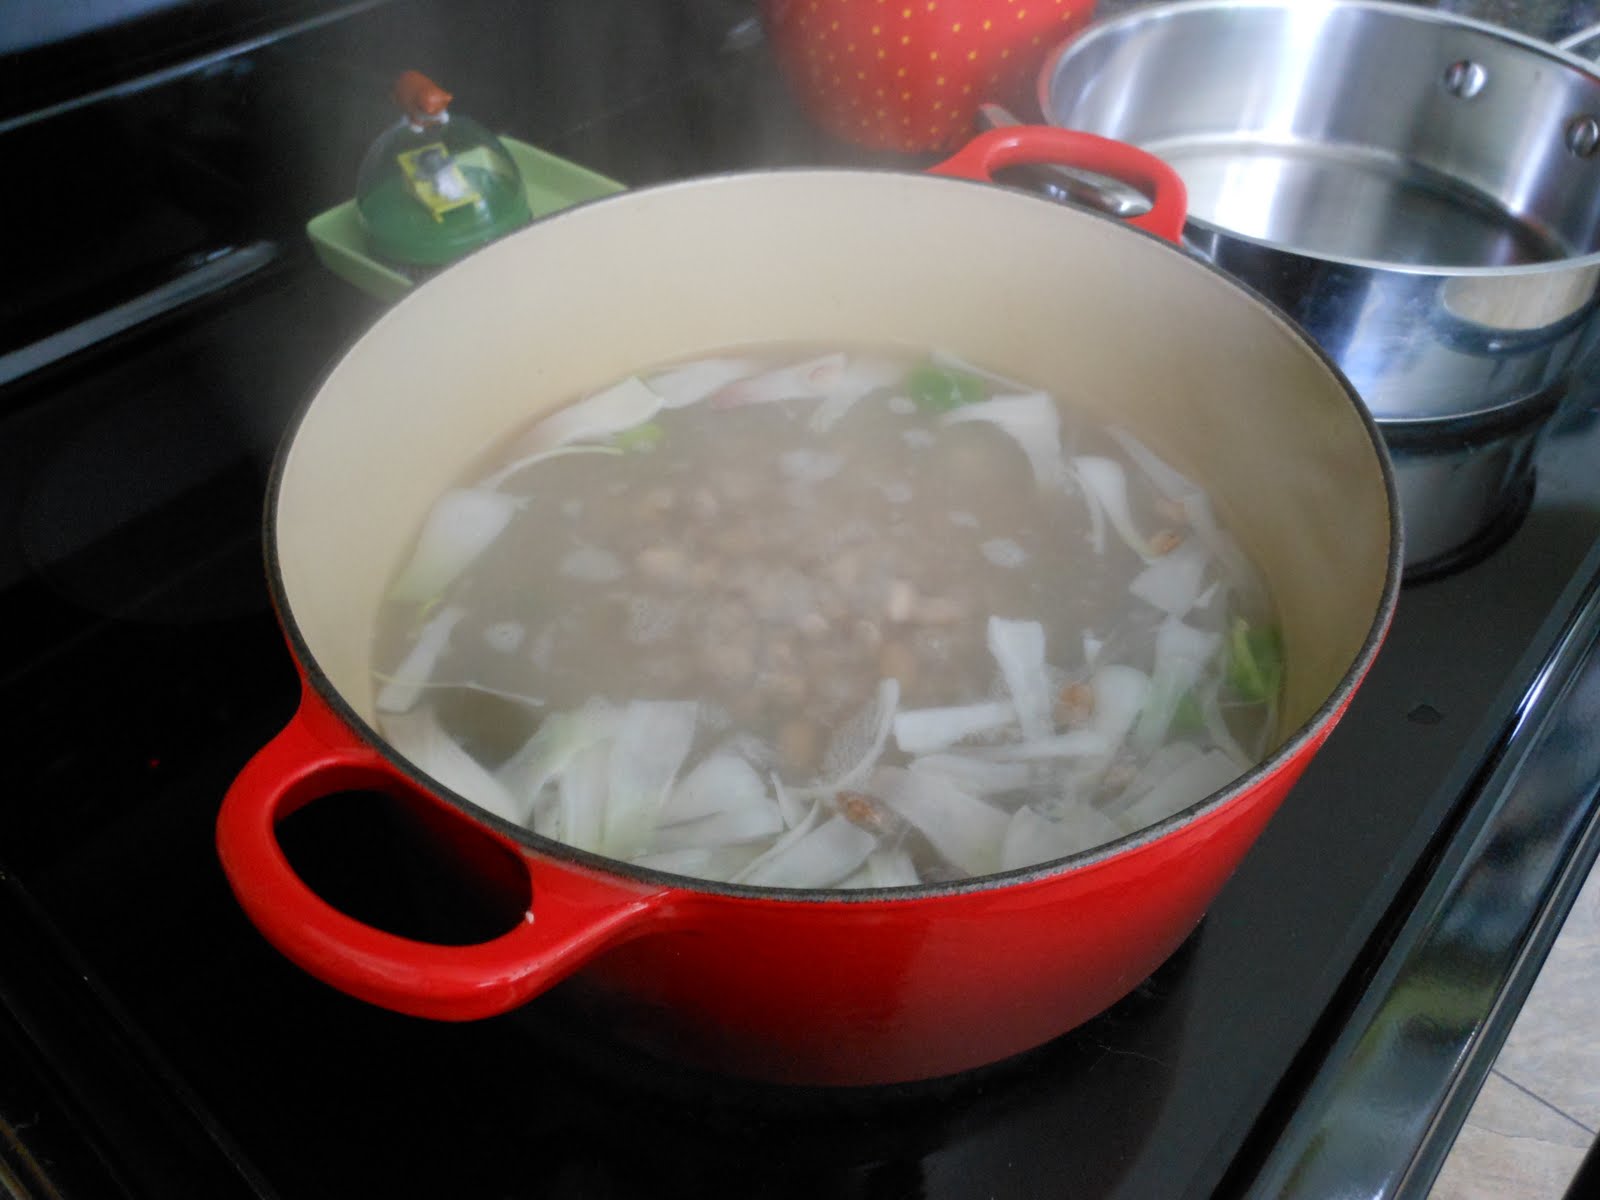
2. While the meat mixture is sautéing place the rinsed and drained beans, tomato sauce, jarred tomatoes, 1c water and chilies in your crock pot or a big soup pot-set aside.

3. Next add the spice mixture and dry ranch packet to the meat mixture, stir to combine. When this has cooked for about 2-3 minutes add 1c. water and let the mixture simmer until the water has evaporated. (This will concentrate the flavors and will be amazing.) When the water is gone, turn off the heat and add the meat mixture to the bean mixture. Stir to combine all the ingredients.

4. Turn your crock pot on low and let the it go for a few hours. If using a soup pot turn to low and let simmer away until ready to eat. Taco Soup is like chili, it gets better with time!
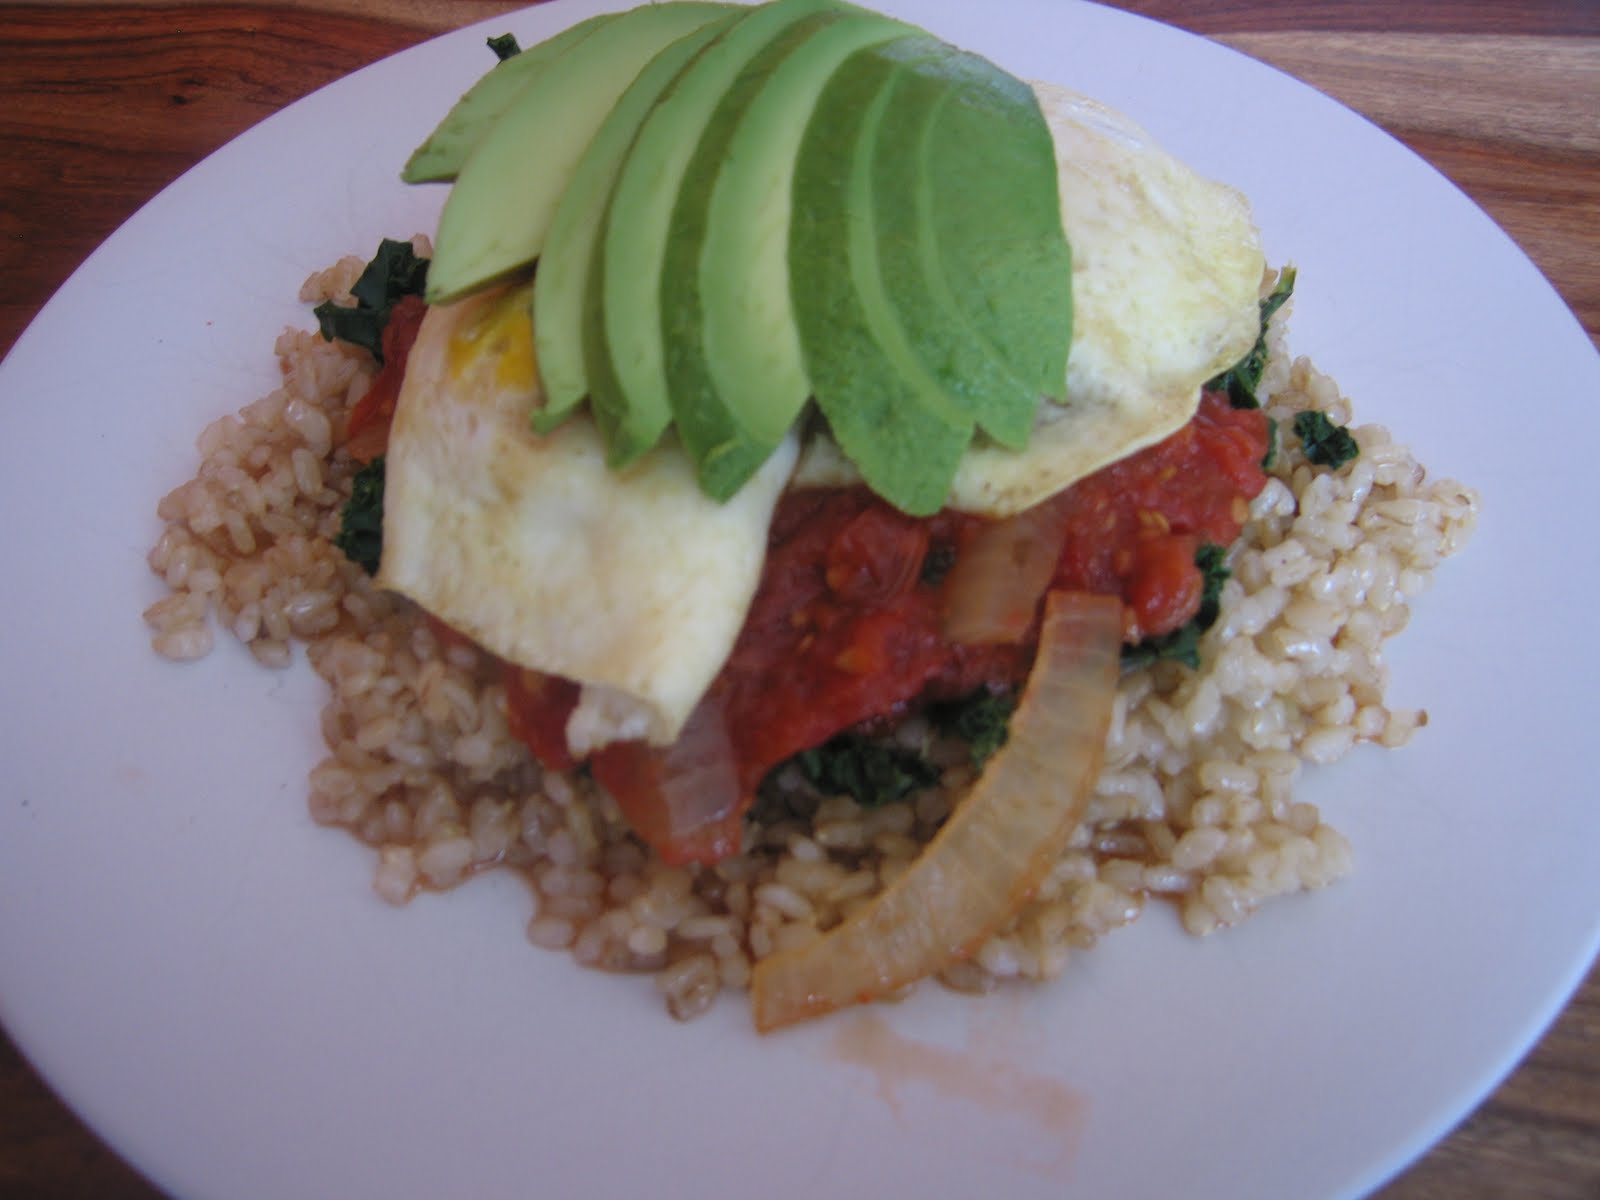
Toppings-

Sliced avocado

Sour Cream or yogurt, shredded cheese

Hot Sauce

Quinoa Cornbread (we crumbled this on top and it was FABULOUS!)

Nutrition:

Grass-fed beef- Is lower in total fat, 3x omega-3 (diet high in omega-3 reduce Alzheimer’s, Arthritis, ADD, Cancer, Depression), 3x conjugated linoleic acid (anti-cancer agent, reduces risk of diabetes), 4x vitamin E (reduces risk of cancer, heart disease, anti-aging properties), 2x vitamin A (important for vision and bone growth, maintains integrity of skin, regulates immune function). COWS EAT GRASS NOT CORN!

Beans- Check out this earlier post Benefits of Beans

Love:

Everyone grew up with a version of this classic. I used to make it for Bill-y all the time in the beginning of our relationship, but I got burned out on it and the fact that we don’t eat a lot of meat at our house, this recipe hasn’t been made for quite some time. Well, I wanted to make Bill-y something yummy for Super Bowl so VOILA! I took some old ideas and mixed them with some new ideas and the result was probably the best Taco Soup I have ever made. We have had it for two dinners already and still have leftovers, I was thinking about using the leftovers on a baked potato YUMMY! Enjoy!

Azuki/Aduki Beans with Kabocha Squash

15 Sunday Jan 2012

Posted by cosmohippiechef in beans, vegan

≈ Leave a comment

Tags

beans, gluten free, mexican, squash, vegan


Azuki/Aduki Beans with Kabocha Squash

 Food:

Azuki/Aduki Beans with Kabocha Squash – Makes 8, 1/2c.-3/4c. servings (I make this for mine and Bill-y’s lunches Mon-Thurs)

4-6 inch piece of kombu*

1 1/2c. dried azuki beans (they are sometimes labeled aduki)

2c. heaping of kabocha squash, cut into chunks (peel if not organic, I have found this type of squash at the farmers market, asian market and my health food grocery stores. If you can find this type of squash use butternut squash.)

1 Fresno chile, chopped (not in the recipe but I love Fresno chiles they have a sweet heat)

2-4 cloves garlic, chopped (also not in the recipe but I love garlic)

1/4-1/2 piece of yellow or purple onion, chopped (also not in the recipe but who doesn’t love onion?)

1/4c. Bragg’s liquid amino’s (this is a great product, you can find it at most stores. You can use soy sauce but I would HIGHLY suggest you get Bragg’s liquid amino’s.)

chopped parsley or cilantro for garnish

These humble ingrediants make one 'heck' of a dish!

Getting started! You won't believe that such a simple dish can be this good.

Directions:

1. Combine the kombu and the beans in a bowl and cover with water by an inch or two. Soak overnight. The next day, drain the kombu and the beans and discard the soaking water. Slice the kombu into 1 inch pieces and place them into a heavy pot with a heavy lid, preferably enameled cast iron. Add the beans and enough fresh water to just cover the beans. Bring to a boil.

2. As the beans boil, strain off any foam that rises to the top. Let the beans boil, uncovered, for 5 minutes, as this allows the gasses to release. Cover the pot, reduce the heat to low and simmer for 40 minutes. Check the beans every 10 minutes, and add water if the water level dips below the bean level. After 40 minutes add the Fresno chile, onion and kabocha squash, add more water just up to the level of the squash. Place the lid back on the pot and cook another twenty minutes, check to see if the beans are tender. After 20 minutes add the Bragg’s liquid amino’s and the garlic and cook for another 10-15 minutes. Ready! Serve hot right away or ladle into lunch containers.

Toppings: chopped avocado, scallions, parsley, cilantro and DIY Tofu Sour Cream (recipe on the blog) optional 1 tsp miso, stirred in just before eating

Nutrition:

Kabocha- Kabocha squash is a Japanese variety of squash, it is low card and an excellent source of bete carotene which is a very powerful antioxidant and anti-infamnatory. It is also a good source of iron, vitamin C and some B vitamins. Beta carotene can be converted into Vitamin A in the body Vitamin A is important for healthy white blood cells which equals good immunity, it also keeps skin and hair healthy.

Azuki/Aduki Beans– These beans are easy to digest and known to benefit the kidneys and detoxify the body. Pair well with sweet winter squash and root vegetables. (Courtesy of ‘Clean Food’ by Terry Walters) (A staple in my pantry)

*Kombu– A small piece added to grains, soups, sauces and legumes during cooking is an easy way to infuse foods with highly alkalinizing minerals, iron and iodine. Also known for its ability to tenderize legumes and reduce their gaseous properties. (Courtesy of ‘Clean Food’ by Terry Walters) (A staple in my pantry)

Bragg’s Liquid Aminos: Condiment that taste likes soy sauce with a hint of maple. Provides essential building blocks of complete protein. (Courtesy of ‘Clean Food’ by Terry Walters) (A staple in my pantry)

Love:

What can I say, this recipe is a major heavy hitter in the nutrition department. I have made this for the past two weeks for lunch. It is very nourishing, filling and taste amazing. This recipe might not be for everyone but we love it! The recipe came from the cookbook ‘The Kind Diet’ by Alicia Silverstone, I added a few things but the skeleton is hers.

Shrimp Tostadas

23 Tuesday Aug 2011

Posted by cosmohippiechef in Fish

≈ Leave a comment

Tags

fish, mexican

I use to make this recipe back in the day when I was single and living in my shabby chic apartment on Elizabeth St., those were the days. What is great about this recipe is that it is fast to whip up and feeds 4-6 people comfortably, with a few beers of course. This recipe is now one of Billy’s favorites and is requested during the summer when something light is called for. I hope you make these for your next backyard hangout. Enjoy!

I bought this beautiful, flavorful shrimp at Aquarius Fish Co.

Disclaimer: There is technically not a set recipe, just don’t over do it on the onions and garlic and you’ll be fine. (This means you Jenn)

-Shrimp Tostadas-

1-1 1/2 lb shrimp (I used large wild Louisiana shrimp) peel, devien and cooked just until pink, drain and let cool and then chop into a few smaller pieces
1/2 large onion, diced
2-4 cloves garlic, minced
1 pint baby size tomatoes
1 bunch cilantro, chopped
1 jalapeno, stemmed, seeded and diced
2 limes, juiced
Salt and pepper

1. Start by placing the onion, garlic, tomatoes, cilantro, and jalapeno into a large mixing bowl. Toss to combine, next add the lime juice and toss again.
2. Add the shrimp to the already mixed mixture and toss another time to combine all the ingredients.
3. Place in fridge and let marinate for a few hours or even overnight. Toss a few times while marinating. Serve cold. (remember this is not an exact recipe, feel free to experiment on your own)

-Toppings-

You can dress yours up any way you want. These are just the toppings we like. Delish!

Mexican Made Easy – Enchilada Sauce

27 Monday Jun 2011

Posted by cosmohippiechef in beans

≈ Leave a comment

Tags

beans, mexican

It’s important for me to push my limits in the kitchen. Last year that was making my own beans instead buying canned ones, and not to toot my own horn but I LOVE my Homemade Pinto Beans (recipe is on the blog). For this batch of beans I also attempted to make my own enchilada sauce to drench our burritos in, it turned out delicious. I think it was do to the leftover juice from my Perfect Roast Chicken.

 The beans boiling away w/ onion (from the farmer’s market), fresh garlic (from the farmer’s market), a little jalapeno and a piece of kombu.
 Yummy enchilada sauce: Saute garlic and onions in olive oil, season with salt and pepper, then maybe 2tsp. each of cumin and chili powder, next a add a heaping tablespoon of flour and stir around for about a minute. Next pour in about 1 c. chicken stock (you could use veggie stock as well) and scrape off any bits of the bottom, when it starts to thicken add a large can of tomatoes, pureed (I used my last jar of canned tomatoes, pureed). Stir everything together and simmer for a bit.
The finished dish! We used Rico’s Whole Wheat Tortilla’s, filled with Homemade Pinto Beans (recipe on the blog) and Beehive Promontory Cheese, topped w/ homemade enchilada sauce, smashed avocado and DIY Tofu Sour Cream (recipe on the blog), w/ a side of fresh greens (from the farmer’s market) and a Wyomatoes tomato. YUM-MY!

Fish Tacos

02 Saturday Apr 2011

Posted by cosmohippiechef in Fish

≈ 1 Comment

Tags

fish, mexican

Billy loves my fish tacos and probably request them every other week for dinner, so I thought tonight would be a great night to treat him since he’s been working in the yard all day! The fish is great grilled on the BBQ or you can bake it in the oven @ 400 degrees for 20 minutes. Which ever way is easiest at the time, both ways produce amazing flavor. Enjoy!

-Fish Tacos- Serves 4

1 lb. Wild Cod (you can use whatever fish you like or use shrimp)

-Marinade-

1/2 onion, sliced in half moons
1/4 c. cilantro leaves, pulled from the stem

All in a bowl:

1 lemon, juiced and zest
1 orange, zest, peeled and segmented
1/2 tsp. cumin
1/2 tsp. chili powder
Salt and pepper

1. Place the fish in a baking dish.
2. Sprinkle the sliced onion and cilantro over the fish.
3. Mix all  the other ingredients in a bowl, mix well and pour over fish.
4. Marinate the fish in the fridge, covered. No longer than 8 hours, toss around the fish 1 or 2 times during the time it’s marinating.
5. To cook, either on the barbecue or in the oven @ 400 degrees for 20 minutes.

Other essentials for the complete Fish Tacos:

Tortillas, (I like sprouted grain tortillas)
Shredded cabbage
Shredded carrots
fresh chopped onion
fresh cilantro leaves
fish sauce (recipe to follow)
lime wedges
sauteed veggies (I do this when I trying to sneak more vegetables into Billy, mushrooms, bell peppers, carrots, onion, zucchini)

Cosmo Hippie Chef Burrito

21 Monday Mar 2011

Posted by cosmohippiechef in beans, DIY

≈ Leave a comment

Tags

beans, mexican, vegetables

So I made a fresh batch of refried beans (posted Nov. 8 2010) for burritos tonight for dinner and maybe one during the week. We are still experiencing cold weather but transitioning into spring. What’s a Cosmo hippie chef to do? On the cold nights we’ll eat the burritos, and on the warmer nights I’ll make something lighter. This is just a blue print of the burrito we made but feel free to use the beans you make any way you like. Enjoy!

-Cosmo Hippie Chef Burrito-

Refried Pinto Beans with Green Chilies (posted Nov. 8 2010)
Cooked forbidden rice (this rice is black but turns purple when cooked! High in nutrients!)
Chopped fresh baby spinach, chopped
Chopped fresh cilantro, chopped
Fresh avocado
Grated local Beehive cheese
Sprouted tortillas
Tofu sour cream (I’ll post this recipe)
*optional- enchilada sauce (homemade, from the store or your favorite Mexican restaurant)

Pinto Beans- Cosmo Hippie Chef Alert!

08 Monday Nov 2010

Posted by cosmohippiechef in beans

≈ Leave a comment

Tags

beans, mexican

I wanted to make something yummy and fun on Saturday for the U of U vs. TCU game, it was a beautiful fall day and I had the time to put in the extra effort it takes to make homemade beans. I have been trying hard to make homemade beans a habit in my kitchen. It takes a little extra planning but the bonus is bulk beans are cheaper than the canned ones, and when you make your own there is always extra so you can freeze them for later use, AWESOME.
Well, my efforts were a huge success my husband and his buddy Charlie loved them, we made bean and wild rice burritos for the game. A few toppings like guacamole, greens, tomato’s, onions, sour cream and salsa and you have the best Mexican in town! And now we have extras for another dinner this week. I hope you’ll try them.

-Refried Pinto Beans with Chiles- Serves 6 (This recipe comes from of my favorite cookbooks ‘Clean Food’ by Terry Walters)

3 garlic cloves
1 onion, diced
2 T. grapeseed oil
4 c. cooked pinto beans
2- 4oz cans chopped green chiles (I only used one)
1 t. chili powder
1 t. cumin
1/2 t. sea salt
2 T. lime juice

1. In a saute pan or Dutch oven over medium heat, saute garlic and onion in oil until soft (about 3 min). Add beans and remaining ingredients and saute another 3-4 min. With the back of the spoon smash the beans to your desired consistency. Remove from heat and serve.
* okay little side note: I made my pinto beans fresh before I made this recipe so I reserved 1c. of the bean cooking liquid. I added this and 1/2c. water to the beans along with 2 T. olive oil and use my hand held blender and blended until smooth. I like my beans more on the creamy side.

– Legumes, Beans – Basic Cooking Instructions
1 c. dried beans of choice (yields 2 1/4c. cooked beans)
water
Thumb-size piece kombu (Sea vegetable that is used to infuse foods with highly alkalizing minerals, iodine and iron. Also known for it’s ability to tenderize legumes and reduce their gaseous properties.)
Pinch of salt

1. Sort through dry legumes and remove any dirt chunks and pebbles.
2. Place legumes in pot with 3 c. water and soak overnight.
3. Drain, rinse, and return to pot with 3 c. fresh water.
4. Cover pot, bring to boil, skim off foam and reduce heat and simmer. Add kombu and salt.
5. Cover and cook until beans are tender (anywhere from 50 min- just over an hour). Test by removing a bean and squeeze between fingers.
6. Drain remaining liquid and store cooked legumes in a airtight container in the refrigerator or freezer.

Pumpkin Corn Bread

04 Sunday Apr 2010

Posted by cosmohippiechef in vegan

≈ Leave a comment

Tags

mexican, pumpkin, vegan

So if you are an avid cook like myself you probably have a hard time throwing away food. I’m always looking for creative ways to use up extra ingredients, that is how this recipe came to be. I had leftover pureed carrots and yams from the Mac and Cheese and remembered that I had pulled this recipe out of the November issue of Better Homes and Gardens while waiting for an oil change on our Prius one Friday afternoon with Billy. I was hoping to make it for Thanksgiving to go in my stuffing recipe but it never happened. But I had to use up the rest of those purees and thought about this recipe, and you’ll never guess what I did with the corn bread… I used it to make corn bread croutons for Black Bean Soup! I’ll give you the recipe the way it’s written and then off to the side tell you what I used, mine is actually vegan. Enjoy.
-Pumpkin Corn Bread-
6 T. butter (I used Earth Balance Butter)
2 c. cornmeal (I used Bob’s Red Mill Coarse Cornmeal, I like the texture)
1/3 sugar (I used Agave Nectar)
2 T. masa harina or corn flour (I used whole wheat flour, it’s just what I had)
2 tsp. baking powder
1 tsp. baking soda
1 tsp. salt
1/4 tsp. pumpkin spice
1 c. buttermilk (I used soymilk)
1 8-oz carton sour cream (I used 1/2 c. Tofutti Sour Cream)
1 egg lightly beaten (I used egg replacer)
3/4 cup canned pumpkin (I used a mixture of the leftover carrot and sweet potato/yam puree)
1. Heat oven to 350 F. Generously brush a 12 inch cast iron skillet with 2 T. butter (I used my bread pan put you could also just use a square pan) they also suggest using 22 muffin tin cups. But if using the muffin tins only cook 8-10 minutes or until toothpick inserted comes out clean.
Set aside.
2. In a large mixing bowl combine cornmeal, sugar, masa harina, baking powder and soda, salt and pumpkin spice. In another bowl combine remaining butter, buttermilk, sour cream, egg and pumpkin; whisk into cornmeal mixture. Pour into prepared pan.
3. Bake for 22 minutes or until toothpick inserted comes out clean, cook on wire rack. Serve warm with whipped butter. (Or make croutons like me )

Brown Rice and Eggs (Cosmo Hippie Chef Alert!)

28 Sunday Mar 2010

Posted by cosmohippiechef in breakfast

≈ Leave a comment

Tags

mexican, tomatoes, vegetables

So this yummy warm earthy dish could probably be found in many different places, though I’m sure we would all interrupt it our own unique way. I first had this dish in Playa del Carmen, Mexico on the same trip I found Chiliquiles. My first thought was Brown Rice and Eggs? What could be special about that it’s so simple? My next thought was it’s a complex carbohydrate (the brown rice) and a healthy protein (the eggs) and will probably sustain me for a good part of the day, even if all I was doing that day was laying in the sun (which I was). So I ordered it and who knew something so simple would be so good. I even went back another morning for the same dish, the second time I asked for some sliced tomato’s for a fresh element and DELISH again. Now when I make Chiliquiles I save some of the tomato sauce so I can use it in this dish, we actually had it for breakfast this morning. Enjoy
-Brown Rice and Eggs- Serves 2-4
1 c. brown rice or more depending on the amount of hungry mouths, (I recently have been using wild rice I think it’s fun to switch it up)
2 eggs per person
Earth Balance Butter, or Olive Oil
leftover Chiliquiles sauce
salt and pepper
* sometimes I saute up some Kale and add it as well (I’m always finding places to add veggies)
**optional: Tofutti Sour Cream, avocado, extra hot sauce
1. Cook rice according to directions, (most times I make the rice a day ahead if I know I’m going to make this dish, it just saves time if making it for breakfast.)
2. Warm up leftover Chiliquiles sauce, (P.S. you could totally make the Chiliquiles sauce just for this recipe.)
3. In a saute pan saute the rice with a little butter or oil just until warmed through (if using already cooked rice). I like a little crunch or crispness to the rice. Salt and pepper the rice just a bit, cook for about 5-10 minutes.
4. Scoop the warm sauce into the bottom of the bowl and top with the sauteed rice. Set aside while you cook the eggs.
5. Add a little more butter or oil to the saute pan you used for the rice. Crack the eggs into the pan, I cook mine over easy but you could certainly scramble them if you’d prefer. Top the rice and sauce with the cooked eggs. (Be sure and salt and pepper the eggs while they cook.)
6. Top with any optional ingredients you would like.

Chilaquiles

07 Sunday Mar 2010

Posted by cosmohippiechef in breakfast

≈ 8 Comments

Tags

local, mexican, tomatoes

I’m not even sure where to begin about this dish, WE LOVE IT! It’s warm, spicy, comforting, and super delicious. I first had this dish in Playa de Carmen, Mexico this last November, and I’ve been making a version of it ever since. That’s what’s awesome about traveling and trying the traditional dishes, you can bring home a piece of that experience. Chilaquiles is a traditional Mexican dish, typically corn tortillas cut into quarters and fried are the basis of the dish and a green or red salsa is usually poured over the tortillas until they begin to soften. Either eggs or pulled chicken are sometimes mixed in. The dish is topped with cheese and sour cream and maybe served with refried beans. It’s usually eaten for breakfast or brunch, this makes it a popular recipe to use leftover tortillas and salsa. They also believe this dish is a cure for a hangover… you decide.

I will share the way I interpreted the dish but try and make it your own. We thought this dish was special enough for Christmas Eve breakfast with my mom and Big Mike, it was a total hit.

Also my friend Nicole asked me for some Indian cooking tips, and I told her I would post a list of Indian spice that I think would possibly work with this dish. Enjoy!

–Chilaquiles– Serves 2

4 eggs
2 tortillas (I use organic sprouted wheat tortillas, burrito size)
1 jar canned tomatoes, or 32 oz. can crushed tomatoes
1-2 chipotles in adobo sauce (I pour the rest of the can into a Ziploc and toss in the freezer)
half a medium yellow onion, cut into 1/2 inch rounds and cut in halve again
olive oil
salt and pepper

-Toppings-

avocado
tofutti sour cream, or regular sour cream
cheese
hot sauce

1. I start by simmering the jar, or can of tomatoes in medium saucepan over medium heat, when the tomatoes begin to simmer I season with salt and pepper. Chop up the chipotles and toss into simmering tomatoes. Turn down to low and let simmer while you work on the other ingredients. (When using canned tomatoes from the store, if the mixture looses all it liquid add just a little water. You want it to be thickened and reduced, but a little liquid is ideal.)

2. Pre-heat oven to 350 and line a cookie sheet with foil, take to tortillas and cut in half, and then in half again. You’ll have 4 quarters then cut each of those in half and place on cookie sheet. Drizzle with a little olive oil and when oven is ready place in oven and bake for 10-15 minutes. You want them crispy and slightly browned. When done take out of oven and let cook.

3. Next get two bowl ready for serving. Place a frying on medium heat with a little olive oil crack all the eggs and begin to cook, be sure to season with salt and pepper. Cook them to your liking, we like them over easy.

4. Just before the eggs are cooked add the half moon slices of onion into the tomato chipotle mixture and stir in. Then warm then through just a little, when ready spoon about 1/2 c to 2/3 of a cup of the tomato onion mixtuer into each bowl, next top with the eggs.

5. At this point it’s up to you what you want to top your dish with, we like tofutti sour cream and avocado for sure. If we have cheese we add it, if not it’s great without cheese. I place the baked tortilla wedges around the outside of the bowl. (I have a soggy bread and tortilla thing, this ensures that they don’t get to soft before I can get to them.)

Here’s a few Indian spices I think would work if you want to take the dish that direction.
Cinnamon, Cloves, Allspice, Cumin, Nutmeg, Corriander, Tumeric and Dried or Fresh Parsley,
I would start with about 1/4 t. of some of these to start out, remember you can always add more.

P.S. We had this dish for brunch this morning, and maybe for dinner later in the week :), also I use the leftover sauce for another dish that I will share, Brown Rice and Eggs.

Like me on Facebook

Like me on Facebook
Follow Me on Pinterest

Recent Posts

  • Leftover Local Turkey, Apple, Potato and Smoked Gouda Salad w/Cranberry Mustard Vinaigrette
  • Spiced Apple Zucchini Muffins (Cupcakes) w/Chai Buttercream Frosting
  • Oat Free Granola- Seasonal Fruit and Local Goat Yogurt Breakfast Parfaits
  • Cherry, Quinoa, Goat Cheese Salad w/Honey Wine Shallot Mustard Vinaigrette
  • Rhubarb Ginger- Mint Lime Shrub

Archives

Categories

Tags

almond meal apples arugula asparagus bananas beans beets bok choy bread broccoli brown rice brussels sprouts cauliflower cheese chicken chilies chocolate cilantro coconut coconut milk corn dates eggs Farro fish fruit garlic ginger gluten free goat cheese goat yogurt green onions greens herbal honey hummus juicing kale lemon lentils liquor local mexican mint miso nuts oats onions parsley pasta peaches peanut butter peas potatoes pumpkin quinoa radishes raw rhubarb salad seasonal seeds soup spinach squash strawberries tart dried cherries tofu tomatoes turmeric vanilla vegan vegetables walnuts zucchini

Enter your email address to follow this blog and receive notifications of new posts by email.

Join 127 other subscribers

RSS Cosmo Hippie Chef

  • Leftover Local Turkey, Apple, Potato and Smoked Gouda Salad w/Cranberry Mustard Vinaigrette

Spring SuperFoods

Spring Comfort

Spring Green

Spring Fresh

Spring Raw

Spring Love

Spring Clean

Anytime Classic

Anytime Comfort

Anytime Classic

Anytime Comfort

Classic

Classic

Classic

Classic

Classic

Classic

Foodies Search Here:

Like me on Facebook

Like me on Facebook

Recent Posts:

  • Leftover Local Turkey, Apple, Potato and Smoked Gouda Salad w/Cranberry Mustard Vinaigrette
  • Spiced Apple Zucchini Muffins (Cupcakes) w/Chai Buttercream Frosting
  • Oat Free Granola- Seasonal Fruit and Local Goat Yogurt Breakfast Parfaits
  • Cherry, Quinoa, Goat Cheese Salad w/Honey Wine Shallot Mustard Vinaigrette
  • Rhubarb Ginger- Mint Lime Shrub

Categories

Archives

  • December 2014 (1)
  • November 2014 (1)
  • October 2014 (1)
  • June 2014 (3)
  • May 2014 (1)
  • April 2014 (2)
  • March 2014 (2)
  • February 2014 (1)
  • January 2014 (3)
  • December 2013 (2)
  • November 2013 (3)
  • October 2013 (7)
  • September 2013 (4)
  • August 2013 (3)
  • July 2013 (3)
  • June 2013 (4)
  • May 2013 (1)
  • April 2013 (4)
  • March 2013 (5)
  • February 2013 (4)
  • January 2013 (4)
  • December 2012 (3)
  • October 2012 (1)
  • September 2012 (3)
  • August 2012 (3)
  • July 2012 (5)
  • June 2012 (2)
  • May 2012 (2)
  • April 2012 (4)
  • March 2012 (7)
  • February 2012 (13)
  • January 2012 (9)
  • December 2011 (2)
  • November 2011 (3)
  • October 2011 (8)
  • September 2011 (1)
  • August 2011 (5)
  • July 2011 (9)
  • June 2011 (13)
  • May 2011 (8)
  • April 2011 (14)
  • March 2011 (8)
  • February 2011 (4)
  • January 2011 (5)
  • November 2010 (7)
  • October 2010 (2)
  • August 2010 (4)
  • June 2010 (8)
  • May 2010 (3)
  • April 2010 (10)
  • March 2010 (4)
  • February 2010 (1)
  • January 2010 (4)
  • November 2009 (3)
  • October 2009 (3)
  • September 2009 (9)
  • August 2009 (1)
  • July 2009 (4)
  • June 2009 (8)

Blog at WordPress.com.

Privacy & Cookies: This site uses cookies. By continuing to use this website, you agree to their use.
To find out more, including how to control cookies, see here: Cookie Policy
  • Follow Following
    • Cosmo Hippie Chef
    • Join 127 other followers
    • Already have a WordPress.com account? Log in now.
    • Cosmo Hippie Chef
    • Customize
    • Follow Following
    • Sign up
    • Log in
    • Report this content
    • View site in Reader
    • Manage subscriptions
    • Collapse this bar
 

Loading Comments...